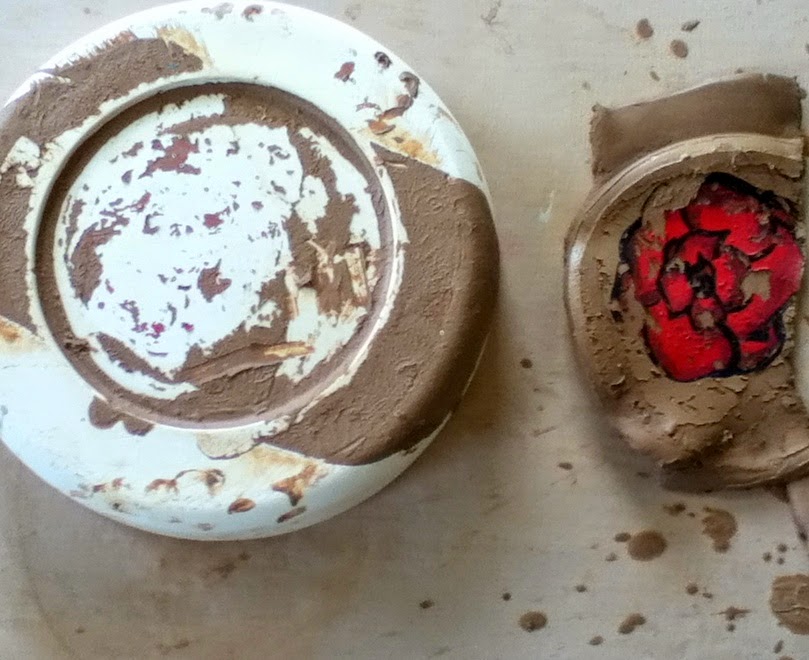
I tried out Chris Dufala's monoprint technique last night in class. (I have a long standing tradition of trying things for the first time in class. Hilarity ensues! Sometimes.) Chris has a detailed step-by-step at this link, which is way more helpful than my fumbles might be, so I'll just briefly describe what I did:
- Paint an image on plaster. You have to think backwards, because whatever you paint first will be the top layer. So, the black outline and shading on the rose was what I painted first, and then the red behind it.
- Let it dry to not-shiny. Pour thin slip of the claybody you are using over the image - a thin layer! My first mistake was using too much slip.
- Slap an already-rolled slab quickly onto the slip layer. I found it helpful to compress the slab downward with a rib or fingertips. Maybe a roller.
- Peel the slab up. God willing and the creek don't rise, your image will be on the other side!
You all know how I love the Law of Entropy! Deteriorating patterns & images are what makes my world go 'round. So I loved the little slab images too much to throw them away but they weren't big enough to make something out of themselves, so....Throw a pot to use them on!
This is what I love about going to NCECA, and workshops generally: when you can take someone else's technique, and use it to make your own work stronger. It's nothing like copying - what I make couldn't be further from what Chris makes, and the uses I hope to put this to are completely different from what he is doing.
Though this was an off-the-cuff pot, I can see this in future "real" work (as opposed to demos.) Maybe not with the tear-throughs...maybe cut windows, looking through at a peeling floral pattern.
Whatever it ends up being, you'll see it here first!


No comments:
Post a Comment