Friday, November 26, 2010

Glazed & Ready


Here are a few pots for tomorrow's firing. I'd like to start loading now but don't dare becaue it is expected to be so cold tonight, and I don't want the pots to freeze; I have written off candling as a waste of money & propane, and an environmentally unsound practice. Unfortumately that means loading & firing happen all in one day, in cold weather.
Anyblah. Glazing is finished, and I can't start loading. Can't clean up until all the pots are out of there...Guess I'm off to read a book. Cheers! Hope your holiday was spectacular.

Sunday, November 14, 2010

And Now A Word About Kiln Shelves

I used my old shelves for the bisque, but they are not ideally sized for the larger dimensions of my new kiln, so in the interests of efficient firing, I'll need to buy some which are better suited. (It is a bit of wisdom here in Maine that "boat" is an acronym for "Bang Over Another Thousand;" it is starting to seem to me that the letters K-I-L-N stand for "Kick In [your] Last Nickel.") I won't have to replace all of them, but unfortunately my newest, straightest shelves are cordierite, also known as mullite. Sad to say, these are not appropriate for soda firing, as the soda vapor will attack the shelf material "aggressively" according to the nice man at Continental Clay, whose name I have forgotten. If I wanted to use them, I could coat the shelves on both sides with a high-alumina wash, but that sounds like a guarantee of little flakes of kiln wash all over the pots; fuggeddaboudit. Anyway, my options are:


  • Regular silcone carbide shelves. These are the black shelves you always see, usually warped. Heavy as all get-out, too. These are about $125 for a 12 x 24 shelf; I shudder to imagine what the shipping cost would be.

  • Nitrite-bonded silcone carbine shelves. These are those skinny (or skinnier), lightweight shelves with the little slits on four sides, called expansion joints, which are intended to prevent (or, really, delay) warping. As these are both lighter & cheaper than regular silicone carbide - and billed as no less strong - they seem like an obviously better choice. So obvious that I almost feel like I am missing something: why would anyone buy regular silicone carbide shelves? The nitrite-bonded are about $75 for a 12 x 24.

  • Alumina Kiln Shelves. These are billed as an economical alternative to silcone carbide, and they are cheaper: I found prices ranging from $34 to $83. They are an inch thick and weigh a bajillion pounds (or, you know, 22 lbs: close enough.) Still, the difference between $34 and $75 is not inconsiderable since I will have to buy maybe 8 shelves....Hmm.

  • Advancer. A girl can dream! These litte beauties weigh less than 10 lbs for a 12 x 24, and are only 5/16ths of an inch thick. Sadly, they are probably ("probably," she says, ha-ha.)out of my price range, at $175 each. I admit a great temptation, however: I am not particularly burly, and not getting any younger (looks can be deceiving!) and I hate to think of how I will load 20 years from now. Maybe I will hire a buff assistant. Yeah, okay, an assistant would be even spendier than fancy shelves, so maybe not.

Friday, November 12, 2010

Ware Not Air

First bisque!
Although I thought I had a crazy amount of greenware, I managed to fit all of the bone-dry pieces into the kiln. I have more capacity than I thought, so hooray for that. I just kept squeezing it in, because it takes almost the same amountof propane to heat ware as air. A couple of notes:

  • The door blocks fired without incident, much to my great relief. 
  • They shrunk about an inch, out of a starting length of 17.5 inches. So that makes the shrinkage rate of this castable recipe about 5.5 %. Not too bad, but more than I had counted on; so now I am going to have solve a gappage problem, by cutting or casting bricks to fit. (I could just print the recipe, but there is some silliness on the Goshen College page about all-rights-reserved, blah-blah-blah. I think it unlikely that they would even know about it if I did publish it, and quite laughable that they would try to protect a castable recipe -- for what? -- but I'll respect their preference, while snickering at the pretension.)
  • Um, just, YAY! I'm firing a kiln! For the first time in months! I finally get to see how this heat-box performs.
  • I am hoping for first glaze next weekend, but that's a mad lot of glazing in a short time, so...hmm, maybe Thanksgiving weekend?


Saturday, November 6, 2010

Block Party


After weeks and weeks and weeks of drying - so much that people stopped asking me if I had fired yet: it was getting embarrassing, like asking "Set a date yet?" years after the ring appears - it is finally time to fire these puppies, in what may be my last firing in Watershed's medium gas kiln. (Watershed has about a million kilns, one of which I think of as the gas giant -- more on that later.)

I can think of things that could go wrong ing this firing. I don't wish to enumerate them, for superstitious reasons, but the initials are "explode." I consulted with Kelly Donahoe, the studio assistant at Portland Pottery ( and a darn fine potter herself.) PP had a paid firing last month of some blocks much larger than these; a person was casting all the brick for their kiln. And you thought I was a glutton for punishment; I can't hold a candle to that chick. Anyway, Kelly told me that that firing was slower than the usual bisque, but not by much, just an longer overnight candle. 

My firing schedule looks like this:

  • One pilot on, door cracked, spies out, at 12 noon today.
  • Close door and spies at 10 pm. 
  • Turn on second pilot tomorrow morning early, Say, 5 am. 
  • Do the handy-dandy mirror trick.*
  • If that looks okay, turn burners on tomorrow at 12 noon.
  • Begin a slow turn-up schedule, similar to a glaze firing, without the reduction slowing things down.
  • Shoot right past Cone 10 to see 11 starting. 

*The handy-dandy mirror trick is simply holding a mirror up to the spy hole to see if it fogs up. If it does, the ware is still shedding water -- better stretch out the candle. 

Oh, speaking of gas giants: in addition to making a whole boatload of greenware, I also got some interesting reading done while waiting for water to evaporate. Among others, I read Death from the Skies!: The Science Behind the End of the World and From Eternity to Here: The Quest for the Ultimate Theory of Time. From one or the other of these excellent books, I learned that all the iron in the world - did I say the world? Scratch that: all the iron in the entire universe -- comes from the heart of stars going supernova. That's the only way iron, an element, is created. I'll never look at tenmoku the same again.

Saturday, October 30, 2010

Stillllllll Drying


Holy cow this is taking forever. At this rate I'll be lucky to have pots before Thanksgiving. Got a world of greenware, though.

Saturday, October 16, 2010

Trés Trays


No, wait, that means "very trays," which makes no sense. But "Beaucoup  Trays" doesn't sound as good, and "Many Trays," dumber still. So, let's go with A Whole Bunch of Trays. I like sets. Not necessarily matching sets, as in bowls or mugs, but dissimilar objects that are meant to go together. I've been making olive oil bottles, with handbuilt drip trays, which led to soy-and-wasabi sets, and S & P sets, and oil & vinegar sets, all with trays, of course. 

When I got done with those, I started on a butter dish jag. Not my usual thrown/assembled covered butter dishes; I wasn't in the mood for that much commitment. So I made a few butter trays (for the cat-free home, as they lack covers) inspired by my student Holly Johnson of Hurricane Mountain Pottery. Holly brought a couple of very simple handbuilt trays to class, and I had to try out the design. 


Notice the little cat feet in the third photo. Happy Jack is quite enthralled with my studio work; if he had opposable thumbs, he'd be my apprentice.

Unsurprisingly, to me at least, my results are quite different from Holly's; her trays are slimmer and more elegant, mine more meaty. I am making for the soda firing (please God, someday soon!) and have been working on foregoing much of the wet surface decoration to allow for the the action of the flame. I do find that different artists using the same techniques will nevertheless have markedly different results. 

After a bit, I decided I was after something even simpler: 

This one is just a fat tossed slab with the sides and corners pressed up. I am looking for a good turquoise Oribe glaze for soda, that I can brush into the interior, to make a nice contrast with the peachiness of the soda vapor glaze. Any suggestions?

Friday, October 15, 2010

Turn, Turn, Turn


To everything (turn, turn, turn)
There is a season (turn, turn, turn)
And a time to every purpose under heaven.

Doug & I finally brought my wheel up from the summer studio. I am always excited to bring it out, every spring, but having it inside is kind of inspiring, too. Also inspiring: I am running out of pots, and I have several requests from stores to bring more. I may have to do one more firing at Watershed.

The door blocks are taking an unbelievably long time to dry - they are still flexible! And one split, because I didn't properly unstick it from the board it was resting on. Once the blocks are successfully finished, I will post about that process; there is very little on the Web about how it's done, so this is an opportunity for me to provide a real resource. Part of my intention in blogging the kiln-building was to make similar projects seem less intimidating to anyone out there in TV-land who was considering it: if I can do it, and eff up along the way, and eventually get it right, well, it looks like anyone could. 

I should, of course, have cast the door blocks first, or at least as soon as I knew the final dimensions of the door, but I often back into projects, doing the parts I know how to do first; otherwise my not-knowing may become an obstacle to ever getting started. The way to begin is to begin. 

It's a crap day in central Maine, cold and rainy: perfect for sitting in my warm dry studio, throwing pots. Turn, turn, turn. 

Sunday, September 26, 2010

Downtime

I would do the happy dance, but I am too tired. The kiln is done! Well, sort of. The door blocks are cast, and it will take them a few weeks (!) to dry, and then they will need to be fired ever-so-slowly; but as far as work, there is nothing left for me to do. That feels really weird. I keep thinking I should be doing something, but there's no work to be done.

Sure, I could tweak a few things. The stack could be a foot higher, and it could use an angle iron frame; but those aren't things that really need doing before the first bisque.

I will be posting an entry about the process of casting the blocks soon. That was the only part for which I had never even been present when someone else was doing it, during my prior kiln-building experiences, so I was flying blind but I think I got it sorted out okay. (We'll see. If I didn't, I'll show you that, too.) And thanks to a site called Lulu, I am publishing a book about this project. But mostly I will be spending the three-week drying time making pots to fill this kiln. Not today, though. Today I am gallery-sitting, and resting on my laurels. Laurels decay rapidly, but they sure are comfy while they last.

Cheers! Thanks for tagging along.

Friday, September 10, 2010

Plumb Straight

It's hard to see what's going on in this photo, so I will clarify: I tacked a string with a small weight (a "plummet") tied to the end from the rafter of the roof over the kiln. The purpose is to make sure that the stack goes up straight, as over 30-plus courses of brick, a slight list can turn into a giant, unstable one. As you can see, the 2 courses above the standard come in slightly; fortunately we hung the plumb line before it got any taller. Such simple technology; but nothing better has yet been invented. 

Though the exact function it was made for is unknown, the little stone being used as the plummet has a small groove carved around the narrow end, making it perfect to tie a string around.  That groove was carved over 3000 years ago. The rock was found on the Sebastacook River, a remnant of the people who lived there before Europeans came to this contintent. We've already brought this item to the attention of the archaologist at the Maine State Museum. who deemed it authentic but not particularly unique or interesting, which is why we still have it; but it pleases me to use it to plumb my stack, and imagine somebody millenia ago used it to make straight lines as well. 

Sunday, September 5, 2010

A Few More Notes About Castable

Sorry. Castable is my boom! It won't last. 

I started to apply the insulating layer to the arch today. I decided to mix and apply it one five-gallon bucket at at time, because bashing up soft brick is killing my neck and back, and I just can't do all that I need without interruption. 

I started out intending for the crushed softbrick particles to be about the size of coarse grog, but quickly settled for a gravel-sized bits instead, when I saw how dreary and, eventually, painful the task of crushing brick was going to be. 

They only sell Portland Cement in 94-lb bags. 94 pounds!! Come on. While there are lots of people who can easily lift 94 pounds, there are lots more who can't. I can lift 94 pounds, but, ya know -- I don't want to. I'm going to grunt, and stumble, and possibly lose my grip on the bag, and have to heave it to get it in place, and my back will hurt the next day. Whoever decided that 94 pounds is the optimal package weight in which to sell portland cement was obviously not thinking of women, but not just that -- there are lots of men who would have trouble, too. The entire lot was only $9, which I suppose is great if you need lots and lots of it, but really, who needs that much? I mean, besides almost everybody who buys portland cement. But what about all those -- I don't know -- hobby masons? They must get stuck with loads of extra cement. Me, I would have gladly paid $9 for 40 pounds of it, which I can easily lift. And now I am going to have to figure out what to do with the leftover. Which is going to mean lifting most of it, as I only need a few pounds.

Oh, and I am sure you already know this, but portland cement and concrete (which is conveniently sold in bags weighing as little as 25 pounds) are not the same thing. Concrete has little rocks and other crap in it, which we don't want, as we are going to add our own little rocks and other crap in the form of crushed brick and Hawthorn Bond. Cement is also not to be confused with plaster of paris, but that is a story for another day. 

Anyway. I mixed up a five-gallon bucket using parts-by-volume, 12 pts crushed brick, 7 pts Hawthorn Bond, I pt Portland Cement, 2 pts water. I applied it with a trowel to the west side of the arch, and will finish tomorrow. I certianly hope I am doing this right, as it is a sort of leap of faith -- if I've got it wrong, I'll probably eff up the work I've been doing for months now.

Either way, I'll let you know.

Saturday, September 4, 2010

And Now a Word about Castables

Warning: this entry will likely be hideously boring to non-potters. My apologies. Sometimes I note things here so I know where to find them!

Several words, actually. Turns out to be a more complicated subject than I thought, and very little information is available on the web about castables. It's worth noting that two of the three potters I consulted recommended commercial castable, specifically mizzou, if it is to be used for anything structural, like, say, casting the arch itself. I was able to score four (or four and a half, depending on how you look at it) recipes for insulating castable, such as you would use to put over a brick arch, to slow heat loss. I was quite surprised by how widely differing the recipes are.


Tim Cichocki, a potter from Norrgidgewock, Maine, used this recipe to insulate his groundhog kiln:

Equal parts:

  • Fireclay
  • Sawdust
  • Silica Sand
  • Portland Cement

From Tyler Gulden, Executive Director of the Watershed Center for Ceramic Arts:

  • 12 parts crushed soft brick
  • 7 parts fireclay (Hawthorn Bond)
  • 1 part Portland Cement

Tyler also offered a more durable, less insulating version:

  • 10 parts crushed soft brick
  • 9 parts fireclay
  • 1 part Portland Cement

From Reeder Fahnestock, Watershed's Facilities Director:

By weight

  • 4 parts Fireclay
  • 2 parts Alumina
  • 1 part sand or grog
  • 1 part crushed soft brick
  • 1 part Portland Cement

I found two castable recipes on the web from Goshen College in Indiana. This page contains a very thorough treatment of the subject, and more complicated than my needs require, what with all the laminating of the hot-face and insulating mixes. For my door, I am only casting hot-face blocks, and using soft brick outside them. The recipe that I need for this purpose is:

Door Brick Castable Recipe for Soda: Non-Insulating

  • 10 parts Kyanite
  • 1 part Ball Clay
  • 2 parts Fireclay
  • 3 parts Kaolin
  • P-grog (a high heat duty grog, sold by AP green)

I will be applying the insulating castable directly to the exterior of the arch, so of course there is no way to fire it; therefore Portland Cement is useful is persuading it to set. Portland Cement melts at ^10, however, so I decided to steer clear of any hot-face recipe that contains it. ( I know, I know -- lots of highfire claybodies contain material that fluxes at ^10, it all depends on the proportion, blah, blah, blah. I guess I just don't trust it. Plaster has never been my friend in the studio.) I am leaning towards the recipe which is heaviest on the crushed firebrick, for my insulating layer, mostly because I have  a whole boatload of rubble softbrick, and it seems a shame to waste it. I just have to pulverize it. 

Applying castable will also be a learning experience for me. Specifically I am wondering how long it will stay workable. Should I rent a small concrete mixer to keep it from setting? Or mix up small batches, only as much as I can apply before the set time. What is the set time, anyway?

If you have the answers to these or any of life's persistent questions, shoot me an email at castable@finemesspottery.com , or reply in the comments.

It takes a village to raise a kiln. 

Friday, September 3, 2010

Boom Boom: Out Comes the Form

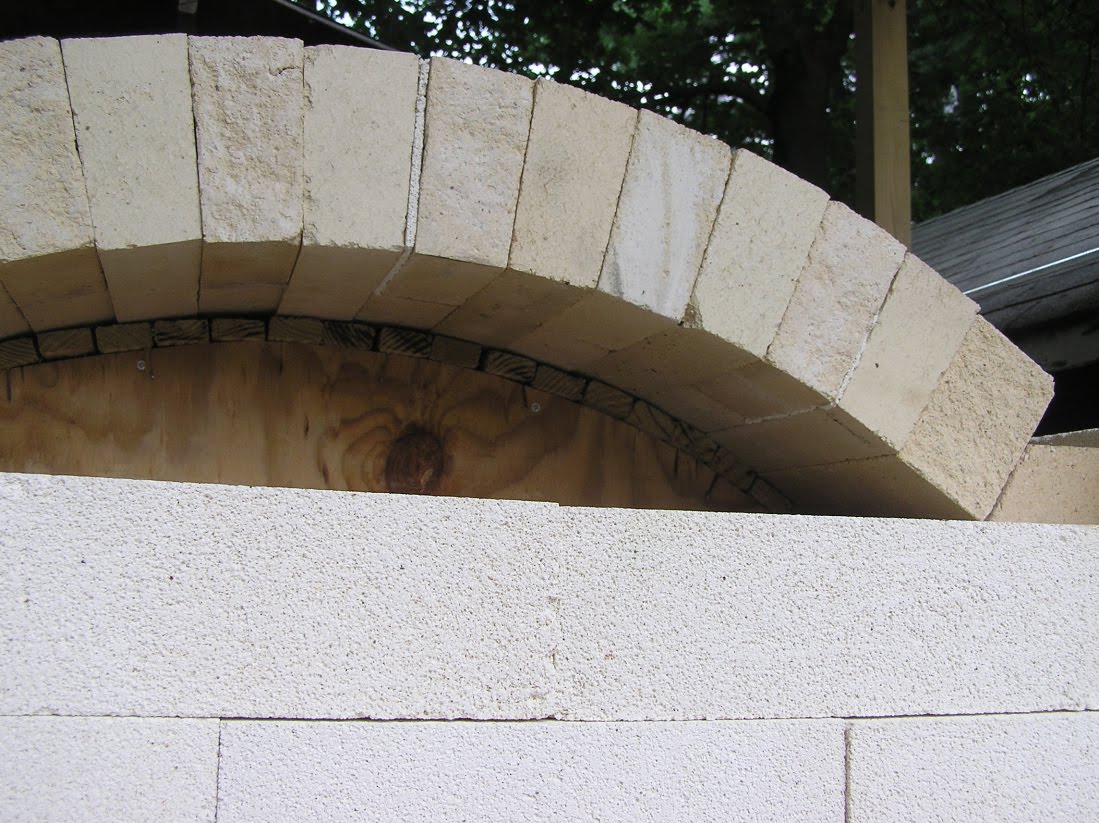
Burn it out? Or slide it out? Burn it? Or slide it? Burn or slide? These are the things I spend my hours wondering. How best to remove the arch form, now that the brick are in place. 

Burning is more fun by miles, but sliding is more practical, as someday I will need to rebuild the arch, and when that day comes, it would be nice to still have the form. So I'm sliding, if I can. It will still be necessary to burn out the frame holding up the form, so I get a little of both. Here goes!


Past the first ring of brick, which required a bolster in one place, but held...


Uh-oh. Damn that quarter-inch plywood! Damn my cheapskate nature.So, the form will not survive anyway, which means Plan B is activated: Burn that baby out!

I had meant to take photos while the form was burning out, but as it happened I didn't care to set down my trusty hose once the blaze began. The spaces in front and behind the arch forn were still unbricked, so the flame was not entirely contained. A couple of notes: 

  • If you live in town, as I do, inform the fire department and your neighbors what is going on. There is going to be a world o' smoke. 
  • We've had a crazy dry summer, so I hosed off evrything near the kiln, including the beams of the roof over it. The tongue of flame jetting out of the front opening would have licked the shed roof five feet above it if I had not been there  damping it back with the hose.
  • I only burned enough to remove the actual  arch form. The support that was holding it at the proper height is  (obvs) very charred, but I will remove it by hand, becuase of the whole out-of-control smoke and flame thing. 
  • A half-brick that had not even seemed loose when I was building dropped precipitously when I slid the form forward. I propped it up until the brick around it could sink the fraction of an inch I knew would occur when the form was no longer holding them up. Once the other brick sank and pressed against it, my woould-be dropsy brick was pinned in place. 

Next on the to-do list: castable.