Pages

Sunday, April 27, 2008

Photo Tutorial: Thrown Oval Butter Dish


I start with a pound and a half of clay, and throw a thick plate, about 6 inches in diameter. It's best to have a well-defined rim, as the rim will be softened a bit by the stretching in later steps.


Then, using about a one-pound ball of clay, I throw a bottomless cylinder also about six inches in diameter, and about 2 1/2 to 3 inches tall.


When removing the cylinder from the wheel, I gently press it into an oval shape.


I then peel up the thick plate and gently slap it down on the table surface, alternating sides until it is oval shaped. Next, i place toilet paper on the oval plate, and place the oval cylinder on top of it, stretching if necessary.

To make the "roof" of the butter dish, I roll out a slab and cut it into an oval a little larger than the cylinder. After letting this breathe for ten or fifteen minutes (handbuilding is all about timing!) I place it on top of the partially constructed butter dish, and stretch it downwards into the cylinder. I let it rest until early leatherhard in this postion, and then remove it, scratch & slurry the top of the cylinder, and flip it over so it creates a domed top. I trim off the excess and then, using a paddle and a gummy rib (the really bendy red ones are the best), I smooth out the seam. All it needs is something to grip, and we're done!




Friday, April 25, 2008

Back at it

Just when I think I am done with glaze, that the thrill is gone, I get a couple of nice pieces that remind me how good it can be.


To do this week:
Friday
• Load Bisque
• KRA
• Email Compliments & Maine Gathering
Saturday
• Fire bisque
• Check glaze -- Mix any low
• Mix glaze tests
Sunday
• Unload bisque
• Glaze Interiors
• Throwing day
• Photo Tutorial -- Butter Dishes

Saturday, April 19, 2008

God said, "HA!"

All of that stuff in the to-do list in the last post? Didn't happen. Well, some of it did: I taught my classes, I did manage to finish the mugs. But on Wednesday my ten-year-old Kia Sephia, which I had long referred to as "my so-called 'car,'" went to meet its maker. It is an ex-car. It stranded me not quite in East Gish -- more like Central Gish.
This plays havok with my ability to get anything done on two levels. Obviously anything I need a car for is out, but also, it's very difficult for me to concentrate on anything else with such a huge problem looming. The subtitle of this blog is "A Potter's Life," so I am including this event: this is part of being a potter for me, always driving an elderly vehicle and always on the edge of stranded. Next time it might not be Central Gish. It might be East Overshoe, or Bumfuck, Egypt.

Nevermind me. I'm just cranky. In a few days, I'll have this resolved, and it will be back to our regularly scheduled programming. We're still on track for a May 2nd firing.

Sunday, April 13, 2008

What's Happening This Week


Monday:
• Beginning Students at Portland Pottery: Glazing
• Call Cry of the loon

Tuesday:
• Intermediate Students, Portland Pottery

Wednesday
• Finish Mugs

Thursday
• Last chance to throw for April 25 bisque!
• Price & Pack Pots for Scottish Lion

Friday, Saturday, Sunday: KRA

Saturday, April 12, 2008

New Pieces


Vases & Butter Dishes. These are leatherhard, and will be finished in the May 2 glaze firing.

Thursday, April 10, 2008

The Atmospheric Bug

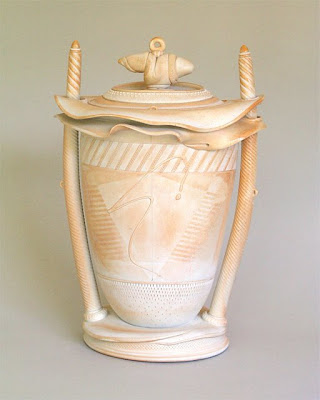
My interest in atmospheric firing is not new, although it has been on hold for quite a while. I caught the fever watching Paul Dresang firing the witty, sybaritic teapots and loving cups he was making in the early nineties. Paul's work has changed greatly in the intervening years, and the new pieces are fascinating in their own way, but this is where it started for me, and I still hope to capture some of the voluptuous qualities that these earlier pieces embodied. (See Paul's new work here.) The work pictured here was fired with residual salt, not soda, of course, and I am learning that soda is not Salt Lite, but they are still a powerful inspriation for me.


Wednesday, April 9, 2008

What's Happening in the Studio


Next Bisque:
Friday, April 25
Next Glaze:
Soda, May 2nd

Wednesday:
• KRA Meeting
• Trim Cat Urns

Thursday:
• Throw Mugs & Butter Dishes
• Call potential outlets

Friday:
• Finish leatherhard ware
• Scouting trip to Camden

Saturday:
• Throwing day
• Mix tests for soda
• Make cone packs:Two each: 012,05,3,6; & 8,9,10,11

Sunday;
• Finish Saturday's pots
• Mix low glazes

Sunday, April 6, 2008

Soda Pots

Here are some pieces from our recent soda firing. I lied, I am not going to post the ugly ones, after all. All of these pieces are for sale at http://finemesspottery.blogspot.com


Saturday, April 5, 2008

This Week in the Studio

Saturday:
• My day at KRA
• Price, pack pots for Ember Grove

Sunday
• Mop!!
• Make 22 Cat Urns for order
• Photograph pots from Soda Firing
• Mix test glazes

Wednesday
• Deliver to Ember Grove
• Trim Cat Urns

Thursday, April 3, 2008

More Thoughts on Soda Firing

After reading the previous post, my good friend and former studiomate Mary Jo Schmith, of Front Avenue Pottery and Tile in St. Paul, Minnesota, offered her thoughts on soda firing, along with some photos of her soda-fired work:


FYI...I fired with soda for 2+ years here at the shop. I tried many different ways of introducing soda in to the chamber, including dumping it in the bag wall with an angle iron rod full of soda bicarb. I finally used a sprayer because
It did NOT leave large chunks of soda on the pots
it did NOT leave large chunks of soda on the kiln furniture...which stinks!!
It DID give the very best distribution of soda thru out the kiln....no dry spots.
Using a regular garden sprayer
4 1/2 lbs baking soda dissolved into 2 gallons hot water in the sprayer
start spraying at cone 8 bending
Spray into each port 12-15 seconds each port.
I think I went around the kiln 2 or 3 times & then waited for cone 9 to bend.
Start spraying again at cone 9
again at cone 10
Keep spraying until all liquid gone.
I drilled 4 new ports into the kiln walls.
one on each side of the kiln, just above the top of the bag wall and about 1 foot away from the burner port.
one on each side of the kiln door, just above the top of the bag wall.
I also sprayed into the peep holes in the door...the ones used for cone spy.
Total of 6 ports to spray in.
The placement of spray holes was clearly to spray soda solution in to the bag wall/flame so the solution would flow with the flame.

The brass tip of the sprayer will most likely eventually melt off so always had a spare tip, including the entire replacement wand!!!

I started with 4 1/2 lbs baking soda PLUS 1/2 cup salt but stopped using the salt entirely because it made the pots dark...dark brown, rather than gently flashed with color.

I also tried placing pots full of soda bicarb around the kiln chamber on the shelves with the pots. This was not all that successful at creating surface BUT DID make a huge mess on the shelves, ruining them!!!!!!!!!!!


Here are a couple more images: